Driving personalization with xConnect APIs and custom facet data Part2
Introduction
This blog post is in continuation to the post 'Driving Personalization with xConnect APIs and Custom Facet Data | Part 1'.
The previous post described how to create a custom facet in Sitecore xConnect, utilizing xConnect API to create a custom console application to create contacts in XDB and saving data in custom facets for those contacts.
This post will focus on the steps required to use the custom data captured to identify the contact visiting the website and rendering personalized content with the help of custom personalization rules.
Follow our session on YouTube
Deploy Model to Sitecore
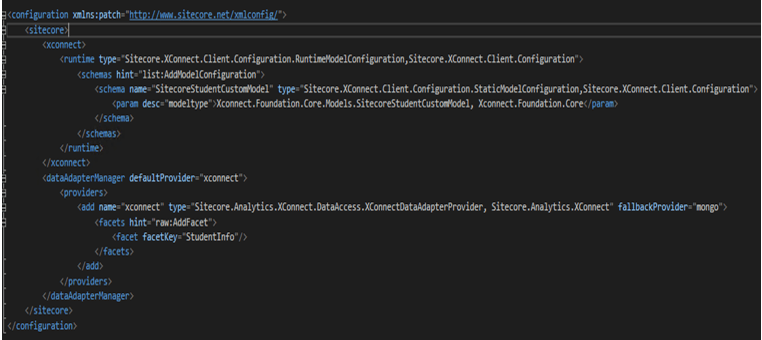
This step is for enabling Sitecore to account for the new collection model and facets to be loaded when contact data is fetched from XDB for tracking.
- Add reference to the library containing the model details to your website application
- Create the following patch file and publish to your Sitecore instance
Identifying the contact
While creating the contact, we added a unique ID as the identifier instead of the email. In our demo scenario we want the visitor to be identified using this unique ID which is available I the query string of the URL that was provided to the student to access the website.
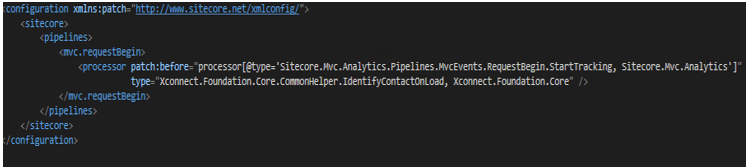
1. We now add a processor the ‘mvc.requestBegin’ pipeline, which would identify the used based on the query string value as soon as the page loads.
 public class IdentifyContactOnLoad : RequestBeginProcessor
    {
        readonly string source = Sitecore.Configuration.Settings.GetSetting("UIDSource");
        readonly string uidQueryString = Sitecore.Configuration.Settings.GetSetting("QueryString");
        public override void Process(RequestBeginArgs args)

        {
            if (HttpContext.Current.Request.QueryString.HasKeys())
            {

                var uid = HttpContext.Current.Request.QueryString[uidQueryString];
                if (!string.IsNullOrEmpty(uid))
                {
                    XConnectHelper.IdentifyUser(uid, source);
                }
            }
        }
    }

    public class XConnectHelper
    {
        public static string facetName = Sitecore.Configuration.Settings.GetSetting("FacetName");
        public static string redirectUrl = Sitecore.Configuration.Settings.GetSetting("RedirectUrl");
        readonly static string uidQueryString = Sitecore.Configuration.Settings.GetSetting("QueryString");
        public static void IdentifyUser(string uid, string source)
        {
            try
            {
                HttpContext.Current.Session.Abandon();

                if (Tracker.Current != null)
                {
                    Tracker.Current.EndVisit(true);
                    Tracker.Current.EndTracking();
                }

                if (Tracker.Current == null && Tracker.Enabled)
                {
                    Tracker.StartTracking();
                }

                if (Tracker.Current != null && Tracker.Current.IsActive && Tracker.Current.Session != null)
                {
                    Tracker.Current.Session.IdentifyAs(source, uid);
                }
            }

            catch (Exception ex)
            {
                HttpContext.Current.Response.Redirect(redirectUrl);
            }
        }
}
2. Add the following patch in a config file to patch the processor created to the pipeline:
Creating custom personalization rule
We now want to create a custom personalization rule that would work on the custom facet value to deliver personalized content to the students.
Application changes
1. Extended helper method to retrieve custom facet data from Tracker
Add the following method to the XConnectHelper class to retrieve custom facet data from the tracker.
 public static string GetCourseName()
        {
            return string.IsNullOrEmpty(HttpContext.Current.Request.QueryString[uidQueryString]) ? "" : StudentInfoFacets().Courses;
        }

        public static string GetCountry()
        {
            return string.IsNullOrEmpty(HttpContext.Current.Request.QueryString[uidQueryString]) ? "" : StudentInfoFacets().Country;
        }

        private static StudentInfo StudentInfoFacets()
        {
            var xConnectFacets = Tracker.Current.Contact.GetFacet("XConnectFacets");
            return xConnectFacets.Facets[StudentInfo.DefaultFacetKey] as StudentInfo;
        }
2. Create custom condition class for the rule
Create a custom rule which would enable rendering different content based on the Course that the student has registered for.
public class DegreeRule : StringOperatorCondition where T : RuleContext
    {
        public string DegreeValue { get; set; }
        protected override bool Execute(T ruleContext)
        {
            string studyArea = XConnectHelper.GetCourseName();
            if (!string.IsNullOrEmpty(XConnectHelper.GetCourseName()))
            {
                if (DegreeValue.ToString().ToLower() == studyArea.ToLower())
                {
                    return true;
                }
            }
            return false;
        }
     }
3. Publish the changes to the Sitecore instance
Sitecore Changes
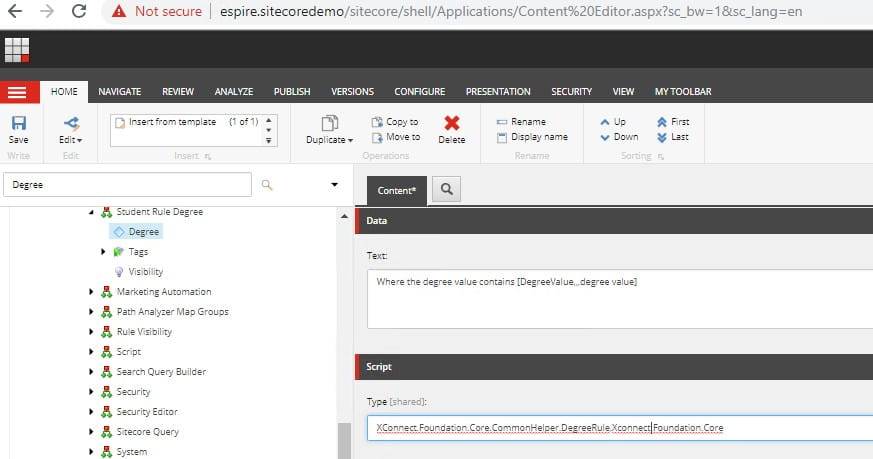
- Create a custom condition in Sitecore at ‘/sitecore/system/Settings/Rules/Definitions/Elements'
- In the text field mention the rule text, which would show up in the Personalization Editor
- In the type field enter the custom condition class created and the library name
- Save the item
- Use the rule set editor to setup personalized variants for content based on the Course selected by the student
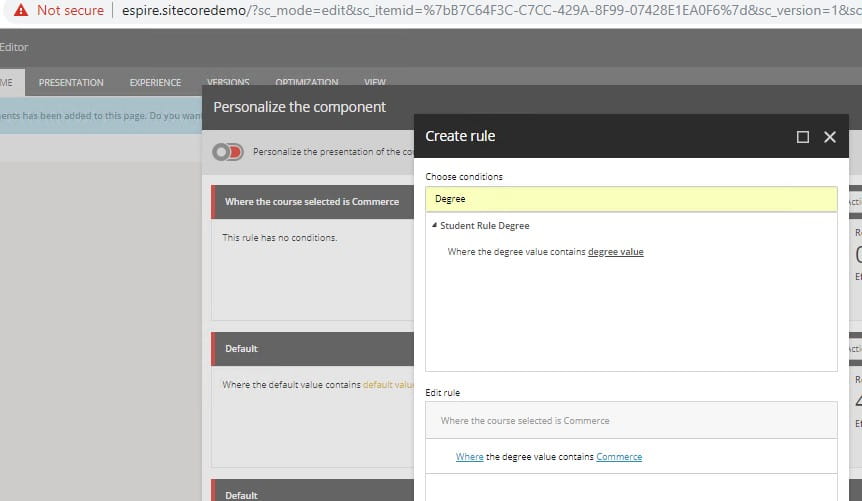
That's it, create more rules to utilize the custom data captured and deliver a highly personalized experience for your visitors.